Showing posts with label garden signs. Show all posts

Wednesday, April 22, 2015

Signs of Life: Second Grade labeling project

This is the second lesson in a project with a second grade class to label plants and the worm bin in the school courtyard.
In the fall I introduced the idea of labelling to the students and we looked at some examples of signs. Students visited the courtyard and reported in sketches and notes on Post-It's what they think a school audience would be interested to know more about on a sign.

This next lesson, students select a plant to label. The format of the label is a 5 x 7 inch Google Slide with a photo image, a sentence or two, and a QR-code to some more information.
Examples of 11 x 7 Garden Plot QR Code Signs using Google Slide format
Printed in color laser on polyester paper
by Mary Van Dyke for Jamestown ES

Draft examples in black/white of formats for 5 x 7 and 5 x 3 plant labels
by Mary Van Dyke

In this second lesson we work in small groups over two hours. I take six groups of four students out.
We tour the courtyard, highlighting the ecosystem value of the plants or plants with interest. Each student has pencil and paper clipped to a whiteboard.  Students can choose whether or not to diagram, sketch and annotate as we tour.

At the end of the tour we convene in the new popup greenhouse dubbed "the White House".

Students group into pairs, each pair decides which plant they would like to label. Some students - as an extension activity - choose to also diagram their selected plant.
After the class I tabulate the choices for the teacher - names of students, selected plant to label, whether or not it is native to northern VA,  and links to information resources on each plant.

The plants chosen today include:

The big native Willow Oak in the center of the courtyard that provides shade for us, and feeds the squirrels and provides shelter and habitat for other animals, and soaks up lots of rain too!

The flowering native Redbud tree where we notice lots of different kinds of native bees drinking nectar and pollinating the flowers.


The spectacular red and white Tulips that kindergartners plant each year.

Apple trees, where we see a ladybug.

Lavender - as its crushed leaves smell amazing.


The exotic rose-flowered Camellia

And beautiful native blue Bluebells


The Boxwoods that remind several students of Colonial Williamsburg.


Students also chose to study and label the beautiful flowering strawberries.


And the native Common Milkweed that is about to sprout in this bed.

Some students will label the worm bin - where today we observe worms, decomposing oak leaves, pillbugs and a spider.

This was a beautiful morning for this lesson.


I notice that given a choice, most second graders did chose to draw and diagram.
Some students though chose to only listen, rather than draw and annotate.
It will be interesting to see if the students who only listened, will design labels and signs as clear as the students that opted to diagram?

Next steps on this "Signs of Life" project over two weeks.
  • Students work on writing a sentence or two about their chosen plant and develop a 7 inch wide x 5 inch high Google Slide with image, text and QR-code
  • Print with color laser on to Xerox Never Tear water-resistant paper
  • Metal sign holders, 7 x 5" horizontal available from SATO retailers, e.g. Speciality Tag and Label
Resources
See my recent blog on labelling and QR Codes 


Friday, March 27, 2015

Technology Outdoors: Using Google and QR Codes for Garden Signs and Labels

Here are FAQs and details to make quick, cheap and easy-to-produce signs and labels with QR Codes for outdoor gardens.

Can we make QR Coded signs with text and images for our Schoolyard or Community Garden?
QR Code
QR Code Garden in Place Stanislas, Nancy, France

What are potential sign techniques and sizes?
  • I describe in detail below how to make large 11 x 7 inch (ie large) signs using Google Presentation and using water resistant Xerox Never Tear Polyester paper 11 x 8.5 letter size.
  • Xerox Never Tear Polyester paper does not need laminating and can be run through an ordinary laser printer.
  • I also show how to make small 7 x 5 inch signs/labels.
  • Both these signs/labels are two standard sizes of readily available "landscape" format galvanized metal sign holders.
  • These sizes work well with the 11 x 8.5 inch paper size. You do need to use a rotary trimmer to trim to finished label/sign sizes.
  • There are other techniques you can try too to make outdoor labels with school students
    • Hot laminating artwork with 10 mm plastic
    • Cold laminating artwork
    • Printing artwork onto adhesive plastic paper and sticking onto corrugated plastic, and using step-sign holders
    • You can send artwork to sign companies

These other techniques are more expensive to produce than using the technique below with Xerox Never Tear paper. You will need to decide what works for your situation.

Do I need to use a computer to set up the label?
  • For the technique here I am describing here you do need a computer set up for QR Codes, text and images. But you could do more simply using weatherproof "Sharpie" pens to draw direct on the weather resistant plastic paper.

What program do I use to set up the label?
  • You can use Microsoft's Word, Powerpoint and Apple equivalents such as Pages and Keynote. I am going to show the technique with Google Presentation.
    • Google Presentation is less sophisticated than the Microsoft and Apple products, but is adequate and much easier for young students to use.
How should students work?
  • Students can work either in pairs, small groups or individually.
  • This technique described below is simple enough to do with second graders and up (with guidance).
  • Decide how you want to work and how many signs you want to produce before you order up the metal sign holders.

Can we print in color? Or should we use black and white for less expense?
  • You can produce signs in either black laser toner or color laser printing.
  • Black and gray printing is cheaper, color is more expensive but can be more appealing.

What kind of sign holders?


Here are the details:

First look around your garden and identify plants and themes that you think an audience (you and others) would like to know more about?
Make a list.
What size sign or label would suit your theme or topic best ie large or small?


To make QR Codes you need to link to content.


So what content do you want to link to?


Will it be a picture?
Or a video?
Or some writing?


  1. Make a googledocument to link to.


e.g. willow oak information


or Students could make their own Googledoc with some information about the willow oak too?


2. Then go to QRstuff.com make a QR Code


  • Make QR Code with the link
  • Download QR Codes - downloads as PNG
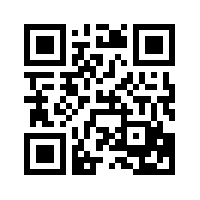
  • Need to export the PNG as a JPG to Desktop - e.g. here is my willow oak QR Code uploaded as jpeg to this document
qrcode.28454372.jpg
3. Try to ensure your content is  "mobile friendly". That is that your information looks good when scanned by a cell phone or tablet by someone visiting the garden.


For signs
  • Think of, and write down your content for the sign and how text and images will work together on the sign
  • What is the heading of the sign?  
    • about 30 point for the large sign 11 x 7
    • about 24 point for the small sign/label 7 x 5
  • One or two sentences
    • about 24 point for the large sign 11 x 7
    • about 18 point for the small sign/label 7 x 5
  • The QR coded information in jpeg format
  • A photo or picture in jpeg format


Then go to Google Presentation
For Large Sign 11 x 7
  • In Google Presentation, go to Set Page, Set Up to 11 x 7 inches
  • Note: the large metal sign holders are 11 x 7 inches
    And your sign can be easily printed off using the Xerox never tear paper that is the standard 11 x 8.5 inches letter size (trim down with rotary trimmer after printing).
  • Now make your sign on Google Presentation
    • Add your heading in large font (ie about 30 point) to be readable from far away
    • Add in your one or two sentences that will be in about 24 point
    • Add in your QR Code as a jpeg to link to extra information
    • Note: it is best if the extra information is "mobile-friendly"
    • Add in your photo or image as jpeg
    • When you are done print off the sign on the special water-resistant paper


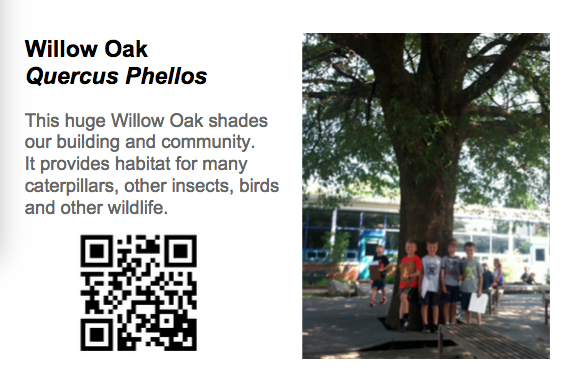
Here’s a sample sign (reduced from actual size of 11 x 7)


Willow oak sign jpg.jpg
For Small Sign 7 x 5
  • Go to Google Presentation
  • Set Page Set Up set to 7 x 5 inches
  • Note: the small metal sign holders are 7 x 5 inches
    And your signs can be easily printed off two to a page as “handout setting” using the Xerox no tear paper that is 11 x 8.5 inches.
  • Now make your sign on Google Presentation
    • Add your heading in large font (ie about 24 point) to be readable from far away
    • Add in your one or two sentences that will be in about 18 point
    • Add in your QR Code as a jpeg to link to extra information
    • Note: it is best if the extra information is mobile-friendly
    • Add in your photo or image as jpeg
    • When you are done share and print. Note when printing - I had success printing two labels at a time as a "handout", two labels to a page and setting to 112% size to optimize result for a close to 7 x 5 each label finished size on 11 x 8.5 paper


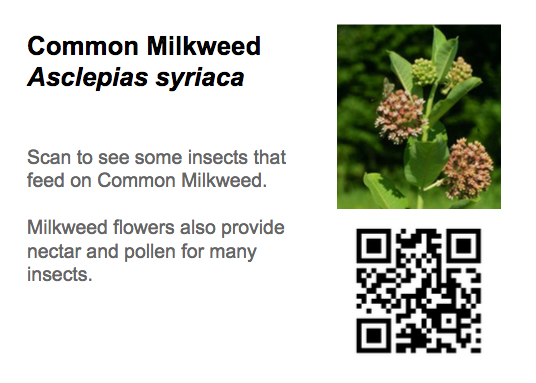
Here’s a sample sign (reduced from actual size of 7 x 5 inch). I chose to label Common Milkweed and the QR Code link is to some information from Monarch Watch on insects that enjoy milkweed as a host plant.

Common Milkweed sign jpg.jpg

Resources
Presentation on QR Codes in the Garden

- Metal sign holders such as from Gemplers.com or others such as SATO Global partners.
- Xerox Never Tear Polyester paper from Staples or others
- Rotary trimmer