Friday, March 27, 2015

Simple Egg Dye Science - reposting from Science Friday

Just in time for your spring-break egg decorating: the science of dyeing eggs, and why add vinegar? And some ideas for "eggsperiments" too.
Click for LINK to Science Friday's Eggs to Dye For by Steven O'Malley.

Undyed Eggs from Different Kinds of Hen, photo Mary Van Dyke

Technology Outdoors: Using Google and QR Codes for Garden Signs and Labels

Here are FAQs and details to make quick, cheap and easy-to-produce signs and labels with QR Codes for outdoor gardens.

Can we make QR Coded signs with text and images for our Schoolyard or Community Garden?
QR Code
QR Code Garden in Place Stanislas, Nancy, France

What are potential sign techniques and sizes?
  • I describe in detail below how to make large 11 x 7 inch (ie large) signs using Google Presentation and using water resistant Xerox Never Tear Polyester paper 11 x 8.5 letter size.
  • Xerox Never Tear Polyester paper does not need laminating and can be run through an ordinary laser printer.
  • I also show how to make small 7 x 5 inch signs/labels.
  • Both these signs/labels are two standard sizes of readily available "landscape" format galvanized metal sign holders.
  • These sizes work well with the 11 x 8.5 inch paper size. You do need to use a rotary trimmer to trim to finished label/sign sizes.
  • There are other techniques you can try too to make outdoor labels with school students
    • Hot laminating artwork with 10 mm plastic
    • Cold laminating artwork
    • Printing artwork onto adhesive plastic paper and sticking onto corrugated plastic, and using step-sign holders
    • You can send artwork to sign companies

These other techniques are more expensive to produce than using the technique below with Xerox Never Tear paper. You will need to decide what works for your situation.

Do I need to use a computer to set up the label?
  • For the technique here I am describing here you do need a computer set up for QR Codes, text and images. But you could do more simply using weatherproof "Sharpie" pens to draw direct on the weather resistant plastic paper.

What program do I use to set up the label?
  • You can use Microsoft's Word, Powerpoint and Apple equivalents such as Pages and Keynote. I am going to show the technique with Google Presentation.
    • Google Presentation is less sophisticated than the Microsoft and Apple products, but is adequate and much easier for young students to use.
How should students work?
  • Students can work either in pairs, small groups or individually.
  • This technique described below is simple enough to do with second graders and up (with guidance).
  • Decide how you want to work and how many signs you want to produce before you order up the metal sign holders.

Can we print in color? Or should we use black and white for less expense?
  • You can produce signs in either black laser toner or color laser printing.
  • Black and gray printing is cheaper, color is more expensive but can be more appealing.

What kind of sign holders?


Here are the details:

First look around your garden and identify plants and themes that you think an audience (you and others) would like to know more about?
Make a list.
What size sign or label would suit your theme or topic best ie large or small?


To make QR Codes you need to link to content.


So what content do you want to link to?


Will it be a picture?
Or a video?
Or some writing?


  1. Make a googledocument to link to.


e.g. willow oak information


or Students could make their own Googledoc with some information about the willow oak too?


2. Then go to QRstuff.com make a QR Code


  • Make QR Code with the link
  • Download QR Codes - downloads as PNG
  • Need to export the PNG as a JPG to Desktop - e.g. here is my willow oak QR Code uploaded as jpeg to this document
qrcode.28454372.jpg
3. Try to ensure your content is  "mobile friendly". That is that your information looks good when scanned by a cell phone or tablet by someone visiting the garden.


For signs
  • Think of, and write down your content for the sign and how text and images will work together on the sign
  • What is the heading of the sign?  
    • about 30 point for the large sign 11 x 7
    • about 24 point for the small sign/label 7 x 5
  • One or two sentences
    • about 24 point for the large sign 11 x 7
    • about 18 point for the small sign/label 7 x 5
  • The QR coded information in jpeg format
  • A photo or picture in jpeg format


Then go to Google Presentation
For Large Sign 11 x 7
  • In Google Presentation, go to Set Page, Set Up to 11 x 7 inches
  • Note: the large metal sign holders are 11 x 7 inches
    And your sign can be easily printed off using the Xerox never tear paper that is the standard 11 x 8.5 inches letter size (trim down with rotary trimmer after printing).
  • Now make your sign on Google Presentation
    • Add your heading in large font (ie about 30 point) to be readable from far away
    • Add in your one or two sentences that will be in about 24 point
    • Add in your QR Code as a jpeg to link to extra information
    • Note: it is best if the extra information is "mobile-friendly"
    • Add in your photo or image as jpeg
    • When you are done print off the sign on the special water-resistant paper


Here’s a sample sign (reduced from actual size of 11 x 7)


Willow oak sign jpg.jpg
For Small Sign 7 x 5
  • Go to Google Presentation
  • Set Page Set Up set to 7 x 5 inches
  • Note: the small metal sign holders are 7 x 5 inches
    And your signs can be easily printed off two to a page as “handout setting” using the Xerox no tear paper that is 11 x 8.5 inches.
  • Now make your sign on Google Presentation
    • Add your heading in large font (ie about 24 point) to be readable from far away
    • Add in your one or two sentences that will be in about 18 point
    • Add in your QR Code as a jpeg to link to extra information
    • Note: it is best if the extra information is mobile-friendly
    • Add in your photo or image as jpeg
    • When you are done share and print. Note when printing - I had success printing two labels at a time as a "handout", two labels to a page and setting to 112% size to optimize result for a close to 7 x 5 each label finished size on 11 x 8.5 paper


Here’s a sample sign (reduced from actual size of 7 x 5 inch). I chose to label Common Milkweed and the QR Code link is to some information from Monarch Watch on insects that enjoy milkweed as a host plant.

Common Milkweed sign jpg.jpg

Resources
Presentation on QR Codes in the Garden

- Metal sign holders such as from Gemplers.com or others such as SATO Global partners.
- Xerox Never Tear Polyester paper from Staples or others
- Rotary trimmer


Second Graders: Talk About Tools and Spring Clean Up

This afternoon is warm. The sun is shining and spring is in the air.
Second Grade are ready to go outdoors and do a “spring clean up” in the courtyard learning lab.


Talking about Tools
Why use tools in the garden? Tools are extensions of our senses and body. We could dig and trim plants with our hands and feet, but technology and tools such as rakes, trowels, leaf scoops, pruners, paper bags and microscopes can help us extend our capabilities in the same way as a pencil is a useful technology or tool for the task of writing and drawing.


We discuss tool safety.

Spring Clean Up
The students are in four groups assigned to different areas of the courtyard:
  • Two groups rake up willow oak leaves and pick up sticks. They have two kinds of rakes, and leaf scoops. It's interesting to take turns with the tools and see how they help us with different tasks. The yellow leaf scoops are like dinosaur paws and the kids love using them!
  • One group uses small pruners to trim buddleia bush back to 12 inches or so above soil, and to trim seedheads off asters and rosebushes, and to take dead growth off the mint and lambs ears. We "tidy up" the decomposing pumpkin. There's a lot of decisions to take when tidying up.
    • Is tidying up necessary or not? 
    • How much leaf litter do you leave for the worms? 
    • How many seedheads should stay for food for the birds and other wildlife and for the plant to reproduce?
    • Where is a good place to trim a plant?
These are all good questions for teaching best management practices and stewardship.


  • Another group uses trowels to weed the “Three B’s: Birds, Bees and Butterflies Pollinator Garden”. Try out different kinds of trowel. Which works best? This bed is full of common milkweed that we are cultivating as a food plant for monarch caterpillars and a nectar plant for many insects and butterflies. With the goal of increasing biodiversity and lengthening the flowering season from spring to fall in this sunny bed, we’ll plant additional vigorous native flowering plants such as rudbeckia, coneflower, mountain mint and goldenrod. At the moment the bed is covered in hairy bittercress, speedwell and mugwort. These weeds very successfully reproduce and spread. The hairy bittercress can propel its seeds 10 foot from the mother plant. These “weed” plants occupy space and take light and nutrients from native plants we are choosing to cultivate. So we are deciding to weed some of them out.

Outputs and Reflections
In one hour the second grade students fill 9 large bags full of organic debris.

This is an enormous amount of work done.  25 students at one hour each is 25 person hours. That would be two weeks of my part-time job here.
  • The students compare the different kinds of rake. Which one worked best with the fine willow oak leaves?
  • The students loved the extended power and aesthetics of the bright yellow “dinosaur paw” leaf scoops
  • Students learned to use pruners safely - point down and using safety catches
  • Students learned to identify plants and learned some management practices
  • Students found and identified worms, ants, and grubs
  • Students learned about waste management and composting issues
We cannot compost on site at the moment. So we choose to throw out the waste with the school trash.  We are working towards some on-site demo composting in the courtyard.  But the reality of gardening in this large courtyard is that we will have too much organic debris each year to compost entirely within the courtyard.  My goal over the next few years is to a) demonstrate on-site composting in a small way and to b) do larger scale on-site composting in bin system and c) also to continue to take waste out of the courtyard.  At the same time we need to be careful to manage for replenishing nutrients in the soil and keep a focus on healthy soil and a healthy ecosystem.


In addition of course there was the more extensive and unpredictable experience of discovery and outdoor learning. A hawk has caught and eaten a junco and students found some remaining feathers. Other students found milkweed seedpods and even some willow oak leaves that were sprayed gold!


All good evidence of the rich learning environment in our courtyard and the value of time outdoors.

The second graders made a significant contribution to the well-being of the courtyard with an hour of “service-learning”. At the same time they are fulfilling Standards of Learning (and NGSS) as we learn about scientific method, life systems, and stewardship issues. The students practice collaborative teamwork as we go too.

Thank you to the parents helping facilitate this session with the Ms Payack’s class.

Resources
Leaf scoops by Gardex Pruners Trowels Weed Identification for Schools by Mary Van Dyke, Green STEM Learning, online and downloadable

Friday, March 20, 2015

The Potato Project: Planting Potatoes with Montessori

It is time (and later in the season than usual) to think "potatoes". It is snowing a little, although we are already past St Patrick's Day and today is the spring equinox.


This spring, the Montessori class are taking on potato planting, care, harvest and cooking as their outdoor learning project.

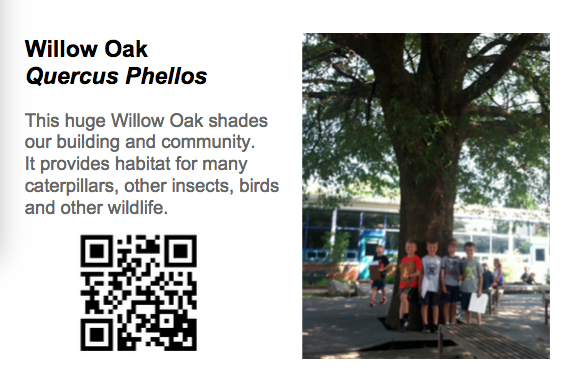
In the fall, I  identified a raised bed for planting close to the students' classroom. The bed is sunny and has water nearby. I enrich the soil with compost.


I initiate "The Potato Project" with two 45-minute class sessions over two weeks, and describe here how to run for a class of twenty, 3 - 5 year olds.
Please note that this activity can be adapted easily for other groups and ages.
  • Click on resources for printable version of these two sessions and higher grade VA SOL or NGSS-linked materials.
Session One: 45 mins: Indoors (can be end of March, around St Patrick's Day)

Introduction and Planning
"One Potato, Two Potatoes, Three Potatoes, Four..."
How many of the students have eaten potatoes?  How were they prepared and cooked?


We look at different kinds of "seed potatoes" and identify eyes, tubers, sprouts. Some of the potatoes are red, others yellow, some are purple.
We discuss that "seed potatoes" are not seeds from flowers, but small potatoes that are living with stored food in the tuber and will sprout to make another plant.
Potatoes are native to Mexico and South American mountain areas.
Potatoes in a market in La Paz, Bolivia
from Vegetables, p. 135 by Roger Phillips and Martyn Rix

Rock-ledge habitat of wild potato in Mexico
from Vegetables, p. 134 by Roger Phillips and Martyn Rix

And grow well in cooler parts of North America in Maine and Idaho - and around the world.
Potatoes growing in Maine
from Vegetables, p. 141 by Roger Phillips and Martyn Rix

The students put the "seed potatoes" on the window cill to sprout.
We'll leave the seed potatoes on the window cill to sprout more, and will plant them in the garden next week - on Day 7.
I ask the teacher Ms Kipperman, if she and the students can cut the seed potatoes in half on Day 6 and leave the potatoes to "heal", to air dry for the planting session next week.

We then read Two Old Potatoes and Me by John Coy. This beautiful book sets the scene for our expectations, the "hypothesis", for our potato cultivation and celebration.

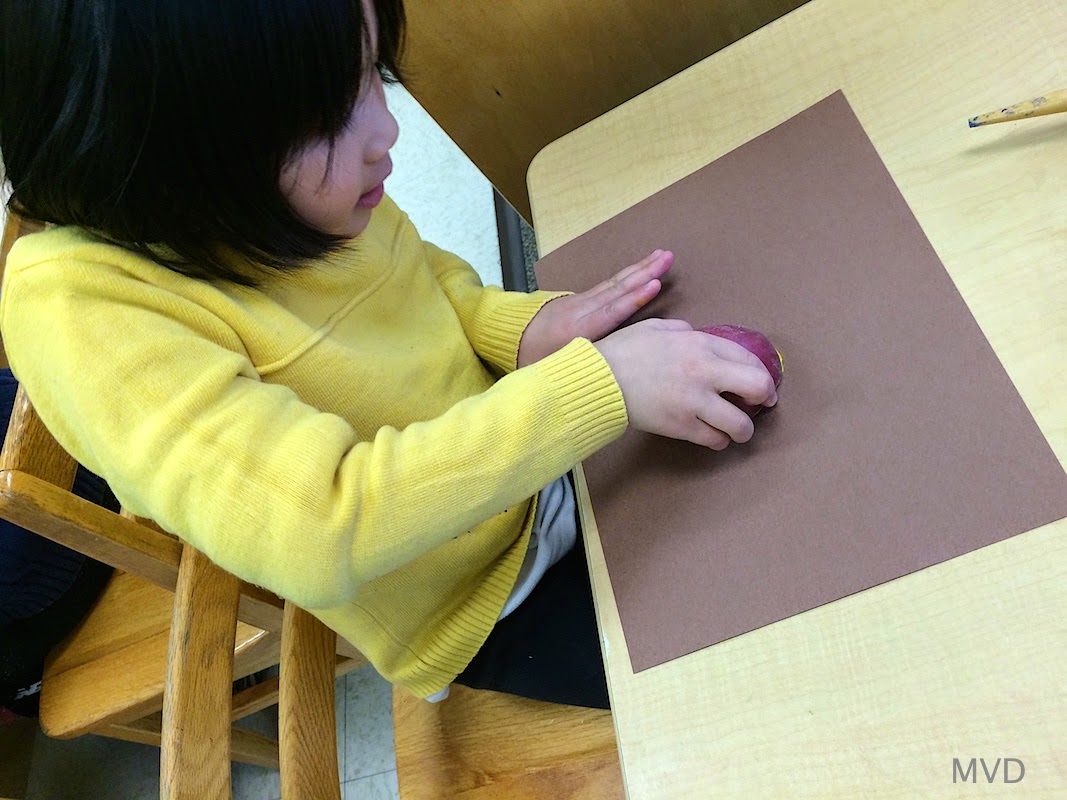
Activity: Potato Printing
Preparation:It takes about an hour for me to cut 5 lbs of potatoes into various simple designs.
I do this in the morning before the class.


In the class, the teacher demonstrates to the students how to apply the paint thinly on the paint surface with a brush, or to dunk the potato in the paint and print. The printing with washable acrylic paints works well on ordinary construction paper.
The potato printing is a quick and fun activity for the students at the end of their school day.


This ends the Day 1, 45-minute session introducing The Potato Project.


Day 6: 
Teacher and students will take the "seed potatoes" that have been on the window sill and cut each potato in half (each half to have two or more eyes) and will leave the potatoes to dry "heal".

Next Week, Day 7,  Session Two: 45 mins: We will be mainly outdoors and
planting before spring break.

Then after spring break there will be class weekly care sessions until June:
  • Go out to potato bed, observe, journal and draw, look out for insects, and water well. 
  • Mound up earth around potato plants leaving some leaves visible. You may need to do this once a month during the growing season.
  • Adults may add compost (or fertilizer) to potatoes once or twice during growing season.
Harvest and Prepare Mashed Potatoes (June and/or September)
  • Class can harvest some or all of the potatoes in June, wash, prepare and serve "microwaved mashed potatoes" as a class celebration.
  • Or you can leave some potato plants to grow until school returns to harvest in September (as a "Legacy Garden" for next  year's class of Montessori students to harvest and enjoy!).

Resources: Link to detailed planning documents for the The Potato Project


Wednesday, March 18, 2015

Think Spring! Plan to Sustain a Teachable Schoolyard

I am the "Visiting Horticulturalist" at Jamestown Elementary School in Arlington and help the school community (staff, parents, students) plan and maintain the courtyard garden and grounds for outdoor learning.

Here's the school Courtyard in October 2014
Jamestown Elementary School, Courtyard
October 2014

Outcomes
What are the short-term outcomes that the community expects by the end of June 2015?
  • A beautiful and useful garden
  • Flowers in bloom
  • Vegetables to harvest and taste
  • To attract and sustain insects and birds while minimizing rodents
  • To increase parent and teacher interest and involvement
  • To increase the number of students learning outdoors
  • To increase use of volunteers, such as Eagle Scouts
  • To demonstrate "evidence of learning" in the garden and on various media
  • Integrated "green STEM" curriculum-linked learning

I have lots of questions to work through myself and with the community.
How can we start from where the community is - and build capacity for those goals over the next few weeks?
What are projects and community-building to put on the to-do list for next year or the distant future?
How do we build time for schoolyard-based curriculum-linked gardening into the already-packed school schedule?
What resources do we have or need in terms of funding and expertise?

In the fall various projects began. The principal, lead science teacher and I met and discussed and surveyed the grounds several times. I made an inventory and site assessment. I met three key parents interested in supporting outdoor learning and I built connections to the PTA, presented to the PTA on growing sustainability and outdoor learning. The PTA had already budgeted for an annual clean up by a landscape contractor, and also funding for Outdoor Learning and my position. An Eagle Scout undertook to gravel the pathway to the big willow oak tree. The teaching platform was repaired by facilities. I talked to custodians, and met and worked with teaching staff to discover what they were already doing, and would like to do, and to define a few projects utilizing different areas of the courtyard and grounds. I took all classes outside to learn, and I made a couple of sample signs to demonstrate potential using QR Codes and graphics.

Logic Model planning
This week in the spring, I sketched out a "logic model" starting with outcomes/outputs of various current and potential projects and worked back to our continuing assessments, and the partners and resources needed for each project. Based on my fall site and class assessments, this week I revisited designs and wrote spring plant lists.

Jamestown Courtyard
Site and Plant Assessment
Today I am out in the courtyard with a volunteer parent for our first spring maintenance session. First of all we take stock of the courtyard after the winter snow. It is windy today and I enjoy listening to the breeze in the huge willow oak tree in the center of the courtyard.
Again lots of questions: What's new since the snow? What needs doing now for a 'spring clean up' prior to planting? What can the students do when they come out in small groups to learn next week?

We decide to begin to maintain one of the flower beds inside the courtyard, and to gauge what students can do.
  • There's lots of leaves from the willow oak that can be raked up and some sticks and branches to pick up - those are great jobs for a class of second graders.
  • The tulips K planted in fall are coming up. A couple of crocuses are out. 
  • The hairy bittercress and speedwell, are already flowering in the milkweed and pollinator garden. Identifying the plants, discussing maintenance and weeding is also a great job for second graders. See link to my Weed Identification for Schools resources.
  • The box bushes are yellow with winter burn. Let's have the students monitor the bushes, and see if the bushes will leaf out or need replacing?
  • We need to move two lavender bushes, and prune the big buddleia shrubs back to 12 inches or so above the ground.  The fall asters need clipping. Pruning and clipping is a great job too for second graders working in supervised small groups. But do we have the tools?
  • The buddleia "butterfly bushes" are beloved in schoolyards but becoming an invasive in this area. Until we have built the community understanding to successfully replace the buddleias with native plants I will manage by clipping off the seedheads in the fall.
  • There's lots of common milkweed growing in the courtyard and the school is devoted to raising monarch caterpillars and butterflies. We decide to focus the milkweed in two bounded beds this year rather than allowing milkweed to grow anywhere in the courtyard. And to increase diversity of plantings in the "milkweed beds" by interplanting with equally vigorous natives: We'll interplant with our local and regional native plants: goldenrod, mountain mint, rudbeckia, helianthus. Students could do the planting after spring break.
  • I take quick review of sun paths, soil conditions to update my site assessment in the fall - some daffodils are now up in unexpected places.
  • Over the winter I started to name and focus the beds in the courtyard - so far we have:
  • Sensory Garden 
  • A Shade Garden
  • Three B's: Birds, Bees and Butterflies Pollinator Garden
  • Ms Zamora's Students Vegetable Patch
  • Bird Station
  • Kindergarten Tulip and Milkweed Patch
Tool Assessment
  • Reassess the tools in the toolshed
  • What tools work?
  • What do we need and how many of each for small groups?

    The school now has plenty of trowels and shovels for planting, digging and weeding, and hoses, watering cans and a big tub for watering. I will buy 4 leaf rakes, 8 pruners, and 4 leaf scoops. I will label and put the pruners in box high up in the shed, and will teach the students how to use these tools safely to trim the lavender bushes, fall asters and buddleias next week.
Processes: Yardwaste and Composting
  • How do we recycle plant material currently and in the future?
    If we dispose of plant material in the school dumpster the yardwaste is shipped out of the county and is likely burned for energy in our local incinerator. Perhaps it goes to a landfill?
    A parent decides on reflection to take home our two bags of weeds today to then leave out for the county to collect as "spring yardwaste" and compost. I am still talking with APS school facilities about on-site composting at schools. Some Arlington Career Center students are designing composters in a new sustainable systems course. I have already offered to the Career Center teachers that Jamestown ES could pilot two of these student designed and made compost bins - one in the Courtyard and one outside by the vegetable beds. I am sure that even two of bin composters like these below will still be under-capacity for the size of the schoolyard and grounds - given the capacity of my large compost area and garden at home.
    Captionless Image
    DC Public Schools - Composter Design

    I look across the river to DC schools for rat-resistant aesthetically appealing design inspiration and also to colleagues Fairfax County Public Schools.
  • There is a large old Mantis tumbler composter at the Jamestown Elementary school, but it is no longer working. A parent is kindly arranging for repair spare parts. I've talked to custodians, parents and staff, we may be ready to start to using the compost tumbler again on a small scale. Parents and students could occasionally add in weeds and the custodians' coffee grounds that are nitrogen-rich and dried leaves that are carbon-rich to create a balanced mix. Even without taking on permaculture or a guiding framework such as Eco-Schools within the school, there is lots to learn from attitudes to composting and our "waste" management practices.

Signage and Media 
How do we best get messages out to the community?  Multi-media and incremental change is key. The staff I am working with have email, a once a week email to parents and the website, twitter and FB. I have couple of signs already for the courtyard linked by QR code to projects. We did a couple of tweets. I am using SignUp Genius to outreach to parents. I will blog garden projects here at Green STEM Learning. My goal is to add more "evidence of learning" in the garden and to use the signs to highlight students learning. A second grade class is taking on to create some signs as part of a project on habitats.

With a view to create more sustainable outdoor learning programs in Arlington, I continue conversations with other schools both in our county and elsewhere. I continue to dialog with others on EfS - Education for Sustainability - and frameworks such as Eco-SchoolsNext month, our county's FitArlington Healthy Community Action Team and Superintendent's Advisory Committee on Sustainability are co-hosting a Growing Green Schools event to encourage more networking and information exchange on learning and best practices between school communities.
As far as Jamestown ES goes I list on the logic model - projects that we will do this spring - and  begin to develop a "wish-list" of others that could be done in the future.


Resources mentioned:

Logic Models: WK Kellogg Foundation, Logic Model Development Guide, 2004
Presentation: for Jamestown Elementary School, Growing Sustainability and Outdoor Learning
Tools: Trowels, Leaf Scoops
Weeds: Weed Identification for Schools by Mary Van Dyke, 2014
Native Plants in Northern Virginia: Northern Virginia Native Plant Campaign - www.plantnovanatives.org
Composting Lessons:
Permaculture Principles http://permacultureprinciples.com/
Eco- Schools USA http://www.nwf.org/eco-schools-usa.aspx
Green Schools National Network https://greenschoolsnationalnetwork.org/


Next Week: Red, White and Blue, Planting Potatoes with Montessori