
Today I am testing flower pounding. I check the craft out online on Pinterest, and find Life Labs Art in the Garden pdf and their how-to YouTube (see Resources). How does flower pounding work in practice?
 |
| Flower pounding to make bookmarks |
Time of year: fall, spring, summer
Age range: 3 years - adult
Time to prep: 20 minutes
Time for activity: 20 - 40 minutes
Materials
Fresh flowers and leaves
Recommended flowers: Rose Campion, Coreopsis, Marigold, Lavender, Impatiens, Lobelia, Violets, and leaves from Parsley, Ferns, Japanese Maple
Hammers and mallets - a selection
Wide painter’s masking tape (1 ½ inch)
Watercolor paper (140 lb), or experiment with other porous heavyweight papers
For bookmarks, in addition:
Plastic bookmark sleeves (2 ½ inch x 7 inch)
Raffia or ribbon ties
 |
| Try a selection of hammers and mallets |
Preparation
- Get together the materials: paper, painters tape, hammers and the mallets
- Prepare for the class by pre-trimming the paper into trim paper into either:
- bookmark sizes (say 2 ¼ inch x 7 inch) to fit in plastic sleeves
- or notecard size (say 3 x 8 inch) to fit in envelopes
Note: Each student will probably make two or three samples.
With class
- Go out to the garden and harvest a handful of a variety of fresh flowers and leaves each. Note that some flowers and leaves will leave more pigment on the paper.

Flowers and leaves from the garden in July - Cut stems and calyx off the flowers. For large flowers, such as coneflowers, discard centers, and use only the petals.

- Work on the ground outdoors, or indoors on the floor or on a cutting board stabilized with a dishtowel or use a phonebook underneath as work surface.
- Cut pieces of painter’s tape about 7 inches long for your bookmarks (or length to fit notecards).
- Place the flowers and leaves face down on painters tape strip. Or put leaves and flowers onto the paper? Which works best?


- Then place the painter’s tape down onto the watercolor paper
- Now pound on top of the tape with a hammer. Make sure to hit each section of tape many times.
- If you need to dampen the sound, you can place a phonebook under the paper.
- Peel back the tape, and look at the paper to see if any area needs more pounding.
- Peel off all the tape. Colors from the leaves and flowers will have left a print on the paper.
- Remove any flower debris that is still stuck to the paper.
- Allow your paper to dry. Use as a notecard, or for a bookmark, or as a decoration.
- Laminate your bookmark or put in a plastic bookmark sleeve - and finish with a ribbon or raffia tie


Extensions
Fabric: Try flower pounding using a firm woven pale cotton fabric such as muslin instead of paper. Place the fabric over the flowers and leaves, and pound directly. Watch the color of the flowers and leaves come through the cloth.
Mordant: Soak the cloth (or experiment with paper) in a salt or soda mordant solution overnight and then dry, before using. The salt/soda solution acts as a mordant for the pigment. Recipe for a yard of fabric is 4 T Alum, 3 T Cream of Tartar, 24 cups of very hot water, mixed together in non-reactive stainless steel or enamel bowl. Put in fabric, stir and leave for 30-40 minutes until cool. Dry in cool dryer or hang out, and iron flat before using.
In my practice
- Parsley and Fern leaves left recognizable green images
- Purple Japanese Maple leaves left faint reddish patterns
- Magenta Rose Campion and purple Petunia flowers imprinted as purple
- Lavender and pink Purple Coneflowers made brown smudges
Resources
Mallets: $3.99 from Ace Hardware
Bookmark sleeves from http://www.clearbags.com/2-1-2-x-7-1-8-6-mil-poly-hanging-bookmark-sleeve.html
Other examples online
Life Labs - The Fine Art of Flower Pounding - pdf from Art in the Garden page 189.
Flower Pounding Note Cards
How to: Hammered flower and leaf prints
Laura C Martin, The Art and Craft of Flower Pounding

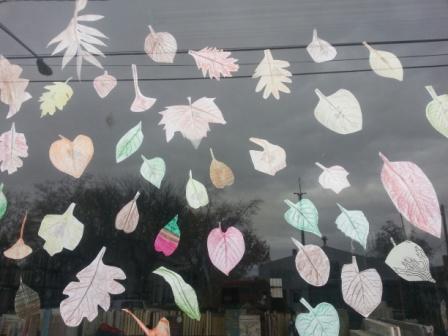 I shared these changes with the afterschool kids, and they discussed seasonal changes they have seen. Due to time and daylight limitations, I brought nature indoors, sharing leaves that I found at home. (If time allows, I’d recommend you take students outside to look for leaves and other signs of fall. Wooded areas, school yards, parks, neighborhoods, even your own backyard are all great places to search.)
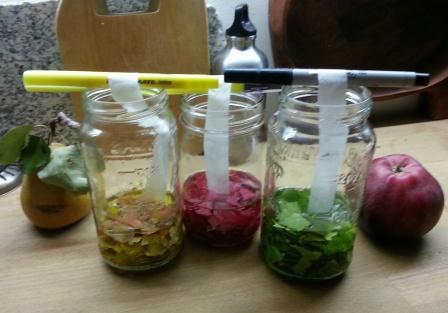 Although a leaf may appear to be one color, it actually contains pigments of multiple colors. In the summer, chlorophyll, the green pigment, dominates, concealing others. As chlorophyll breaks down in the fall, other pigments reveal themselves or form, turning the leaves yellow, orange, or red. I led the afterschool students through a chromatography experiment to identify what colors were hiding inside the leaves.
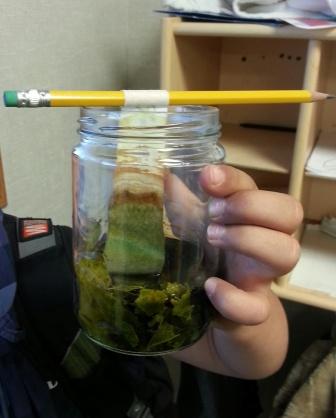 We successfully extracted red, yellow, and green pigments from the leaves! Because the color of each leaf is determined by a combination of the pigments inside, each paper strip had bands of colors in different sizes.


